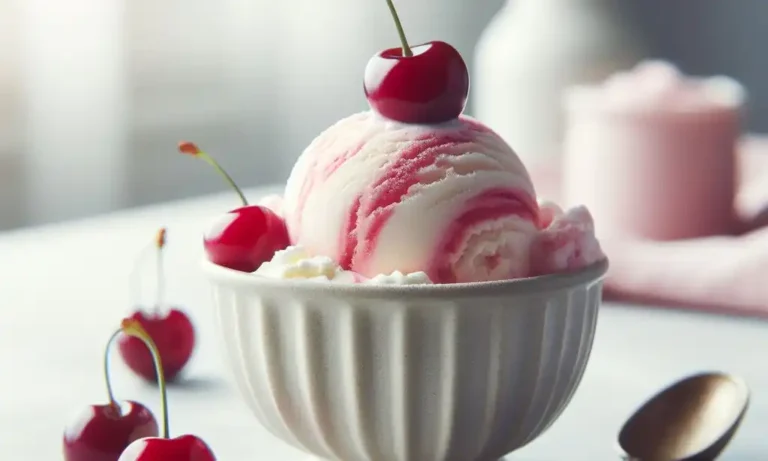
Dulce de Leche Ice Cream Recipe: Your Ultimate Cool Treat
Indulge in a taste of sweetness with our ultimate Dulce de Leche Ice Cream recipe.
This rich and creamy dessert is a beloved classic that originated in Latin America, and has since become a popular treat all over the world.
So grab your apron and get ready to create a delectable frozen treat that will impress your family and friends.
Dulce de Leche Ice Cream Recipe – A Quick Overview

Recipe Description: A creamy and rich ice cream made with the sweet, caramelized flavors of Dulce de Leche. This recipe promises a smooth texture and a depth of flavor that’s irresistibly indulgent.
Preparation Time: 15 minutes (not including freezing time)
Cooking Time: No cook time, but requires several hours to freeze until set
Total Time: About 5 hours (includes freezing time)
Type of Dish: Dessert
The Cuisine of the Recipe: Inspired by Latin American flavors, with a universal appeal
Quantity Produced by the Recipe: Makes approximately 1 quart (about 4 cups) of ice cream
The Number of Calories in the Recipe: Approximately 300 calories per serving (1/2 cup serving size)
About Dulce de Leche Ice Cream Recipe

The Dulce de Leche Ice Cream recipe is a culinary gem, blending the rich, caramelized sweetness of dulce de leche with the smooth, creamy texture of homemade ice cream.
Its simplicity belies the depth of flavor achieved, combining milk, cream, and dulce de leche into an irresistibly indulgent treat.
This recipe captures the essence of traditional Latin American dessert-making techniques while offering a straightforward process accessible to home cooks. It stands as a testament to the joy of creating sophisticated flavors through simple, quality ingredients.
Why Dulce de Leche Ice Cream is a Must-Try?

- Unmatched Flavor: Dulce de Leche Ice Cream combines the creamy, rich base of traditional ice cream with the caramelized sweetness of dulce de leche, offering a flavor that’s both deep and comforting. This unique combination ensures a taste experience unlike any other.
- Versatility in Desserts: This ice cream isn’t just a standalone treat; it’s versatile. Pair it with warm pies, drizzle it with chocolate sauce, or simply enjoy it with fresh fruit. Its unique flavor complements a wide range of desserts, making it a fantastic addition to any sweet course.
- Easy to Make: Despite its sophisticated flavor profile, Dulce de Leche Ice Cream is surprisingly easy to prepare. With minimal ingredients and simple steps, it’s accessible to dessert makers of all skill levels.
- Perfect for Any Occasion: Whether it’s a summer gathering, a special celebration, or a cozy night in, this ice cream fits perfectly. Its rich, sweet taste makes it a hit among both adults and children, ensuring it’s a crowd-pleaser at any event.
- A Touch of Latin American Cuisine: Integrating Dulce de Leche Ice Cream into your dessert repertoire offers a delightful way to explore the rich culinary traditions of Latin America from the comfort of your home.
Ingredients For Dulce de Leche Ice Cream Recipe

- 2 cups of heavy cream
- 1 cup of whole milk
- 1 (14-ounce) can of dulce de leche
- 1 teaspoon of pure vanilla extract
- A pinch of salt
- Optional: 1/2 cup of chopped nuts or chocolate chips for added texture
Essential Tools For Making Dulce de Leche Ice Cream

- Ice Cream Maker: A good quality ice cream maker is crucial for achieving the perfect texture. Whether you prefer a manual churn or an electric model, this tool will help incorporate air into the mixture, making it light and creamy.
- Mixing Bowls: You’ll need at least one large mixing bowl to combine your ingredients before churning. Consider using a bowl with a pouring spout for easier transfer into the ice cream maker.
- Whisk or Electric Mixer: A whisk or an electric hand mixer will ensure that your dulce de leche, cream, and milk are thoroughly combined, without any lumps, for a smooth ice cream base.
- Measuring Cups and Spoons: Accurate measurements are key to the perfect balance of flavors, so having a set of measuring cups and spoons is essential.
- Rubber Spatula: A rubber spatula is perfect for folding in any additional mix-ins like nuts or chocolate chips, and for scraping every last bit of mixture out of your bowls.
- Freezer-Safe Container: Once your ice cream is churned, you’ll need a freezer-safe container to freeze it to the desired consistency. A shallow container can help it freeze more evenly.
- Ice Cream Scoop: For serving, a sturdy ice cream scoop will make creating those perfect scoops much easier.
Step-by-Step Instructions For Dulce de Leche Ice Cream Recipe

- Prepare Your Ingredients: Before starting, ensure all ingredients are measured and ready to use. This will make the process smoother and more efficient.
- Combine Milk and Cream: In a large mixing bowl, pour in the 2 cups of heavy cream and 1 cup of whole milk. Use a whisk or an electric mixer to blend them together until well mixed.
- Add Dulce de Leche: Open your can of dulce de leche and add it to the mixture. Again, whisk or mix until the dulce de leche is completely integrated with the milk and cream, ensuring there are no lumps.
- Flavor with Vanilla and Salt: Stir in 1 teaspoon of pure vanilla extract and a pinch of salt to the mixture. These will enhance the flavors of your ice cream.
- Churn the Ice Cream: Pour your ice cream base into the ice cream maker. Follow the manufacturer’s instructions for your specific model to churn the ice cream. This process usually takes about 20-30 minutes.
- Optional Mix-Ins: If you’re adding chopped nuts or chocolate chips, fold them in with a rubber spatula after the churning process is complete.
- Freeze to Set: Transfer the churned ice cream to a freezer-safe container. Spread it evenly and cover. Freeze for at least 4 hours or until firm.
- Serve: Once the ice cream is set, use an ice cream scoop to serve. Enjoy your homemade Dulce de Leche Ice Cream!
Common Mistakes To Avoid

- Not Using High-Quality Ingredients: The taste of your Dulce de Leche Ice Cream heavily relies on the quality of the dulce de leche and dairy you use. Opt for high-quality, fresh ingredients for the best flavor.
- Skipping the Chill Time for the Base: It’s crucial to chill your ice cream base before churning. Attempting to churn a room temperature base can result in a less creamy texture.
- Overmixing When Adding Mix-ins: If choosing to add nuts or chocolate chips, gently fold them into the mixture after churning. Overmixing can cause the ice cream to become too dense or could break down the added texture.
- Not Freezing the Ice Cream Maker Bowl in Advance: For those using a bowl that needs to be frozen before churning, forgetting to freeze it ahead of time can delay your ice cream-making process significantly.
- Opening the Freezer Too Often During Freezing: Resist the urge to check on your ice cream too frequently during the freezing process. Every time the freezer is opened, it lets in warm air that can affect the setting process.
- Using a Container That’s Not Freezer-Safe: Ensure the container for storing your ice cream is freezer-safe. Other types might crack or not seal properly, leading to freezer burn or ice crystals forming in your ice cream.
Best Ways to Serve Dulce de Leche Ice Cream

- In a Waffle Cone or Bowl: The classic delivery system for ice cream. Dulce de Leche Ice Cream tastes even more delightful when served in a crunchy waffle cone or a decorative bowl, adding an extra texture to enjoy.
- With Warm Desserts: Serve a scoop of this creamy ice cream alongside warm desserts such as apple pie, brownies, or molten lava cake. The contrast between the warm dessert and the cool, creamy ice cream is heavenly.
- As an Affogato: Elevate your coffee game by pouring a shot of hot espresso over a scoop of Dulce de Leche Ice Cream. This Italian dessert will give you a creamy, caffeinated kick that’s perfect for any time of the day.
- Ice Cream Sandwiches: Spread between two cookies or brownies, Dulce de Leche Ice Cream makes an irresistible ice cream sandwich. Choose chocolate chip cookies or snickerdoodles for an extra special treat.
- With Fresh Fruit: For a lighter option, serve a scoop of Dulce de Leche Ice Cream with a side of fresh, sliced fruit. The sweetness of the ice cream complements the natural sugars in the fruit, making for a refreshing dessert.
- Topped with Salted Caramel or Chocolate Sauce: Drizzle your scoop of ice cream with a salted caramel or rich chocolate sauce for an added layer of flavor. The combination of dulce de leche and these toppings is sure to please any sweet tooth.
Tips For Preserving Freshness and Flavor for Longer

- Use Premium Dulce de Leche: Opt for a high-quality dulce de leche for a richer caramel flavor. The quality of your main ingredient significantly impacts the final taste.
- Chill Your Ingredients: Ensure your heavy cream and milk are very cold before starting. This helps in forming a smoother, creamier ice cream.
- Follow Manufacturer’s Instructions for Ice Cream Maker: Ice cream makers vary, so sticking closely to your device’s guidelines will yield the best texture.
- Taste Test Your Base: Before churning, taste the ice cream mixture. Adjust with a little more dulce de leche or a pinch of salt if needed to suit your taste preferences.
- Don’t Rush the Freezing Process: After churning, give your ice cream ample time to freeze solidly. Patience here is key to achieving the perfect scoopable consistency.
- Experiment with Mix-ins: While optional, adding textures like chopped nuts or chocolate chips can elevate your ice cream. Just remember to fold these in gently post-churn.
- Serve Properly: Allow the ice cream to sit at room temperature for a few minutes before scooping. This makes it easier to serve and enhances the flavor.
How to Make This Recipe Perfect Every Time?
- Use Premium Dulce de Leche: Opt for a high-quality dulce de leche for a richer caramel flavor. The quality of your main ingredient significantly impacts the final taste.
- Chill Your Ingredients: Ensure your heavy cream and milk are very cold before starting. This helps in forming a smoother, creamier ice cream.
- Follow Manufacturer’s Instructions for Ice Cream Maker: Ice cream makers vary, so sticking closely to your device’s guidelines will yield the best texture.
- Taste Test Your Base: Before churning, taste the ice cream mixture. Adjust with a little more dulce de leche or a pinch of salt if needed to suit your taste preferences.
- Don’t Rush the Freezing Process: After churning, give your ice cream ample time to freeze solidly. Patience here is key to achieving the perfect scoopable consistency.
- Experiment with Mix-ins: While optional, adding textures like chopped nuts or chocolate chips can elevate your ice cream. Just remember to fold these in gently post-churn.
- Serve Properly: Allow the ice cream to sit at room temperature for a few minutes before scooping. This makes it easier to serve and enhances the flavor.
Conclusion
There you have it—a step-by-step guide to making your very own Dulce de Leche Ice Cream. This delightful treat blends the rich, caramel sweetness of dulce de leche with creamy, homemade ice cream for a dessert that’s sure to impress.
Whether you’re new to homemade ice cream or a seasoned pro, this recipe offers an accessible way to bring a taste of Latin America into your home.
Gather your ingredients, follow the tips for success, and get ready to enjoy a scoop (or two) of this irresistibly creamy dessert.
FAQs
Can I make Dulce de Leche Ice Cream without an ice cream maker?
Yes, you can still enjoy homemade ice cream without this appliance by freezing the mixture for about 4 hours, stirring vigorously every 30 minutes to incorporate air and prevent ice crystals from forming. The texture might be slightly different but still delicious.
Is there a dairy-free alternative for this recipe?
Absolutely! For a dairy-free version, substitute the heavy cream and milk with full-fat coconut milk or almond milk. Keep in mind, the flavor profile will change slightly.
How long does homemade ice cream last in the freezer?
Homemade ice cream is best enjoyed within two weeks of making it. After this period, it may start to develop ice crystals or lose its creamy texture.
Can I use store-bought caramel sauce instead of Dulce de Leche?
While dulce de leche is preferred for its unique flavor, you can use caramel sauce as a substitute. However, expect a lighter caramel flavor in your ice cream.
What if my ice cream is too hard to scoop?
If your ice cream has frozen too solid, let it sit at room temperature for a few minutes before scooping. This will soften it slightly and make it easier to serve.

Hello! I’m Eloise Wilson, the culinary enthusiast behind SimplyCookings. Cooking is my canvas and flavors are my palette. I’m here to share easy-to-follow recipes and kitchen wisdom that will make your cooking journey joyful and delicious. Join me and let’s turn everyday meals into extraordinary experiences!


